Showing posts with label Food. Show all posts

Wednesday, November 12, 2014

Create your own recipe book


I have been looking for a way to condense my recipe books.  I have three binders and they are a bit overwhelming and most of the recipes I never use.  So, I decided to go through my binders and select the recipes I really wanted to keep and publish them in a recipe book.  I looked at a variety of companies to publish my book, but only one had all the criteria I wanted.

My criteria:

1. The book had to be a binder type style, so I could continue to add recipes to it.
2. I wanted the book to be in color and to have photos.  

I could customize this book more on on photobook site such as Blurb, but they didn't offer binder options and being able to add more recipes was more important to me than customizing the page.  

I ended up finding a company called Tastebook that fit my criteria.  I am really happy with my book.  I love that I have a photo of my grandmother right next to her peach pie recipe.  It is wonderful having photos to go along with family recipes and to remember that person as you are cooking or baking.  Also, I can now toss all three of my recipe binders and all my favorite recipes are in one book!  During the holiday season they are also offering 10% off their books.  This would be a great Christmas gift.  You could put all your family recipes in a book and give to grandmas, parents, siblings, etc.

You could do the same thing if you wanted to print your recipes off with a picture on them on your computer and put in a binder with a page protector.  See this post here, but I liked the idea of having something a little more professional.  


Friday, February 1, 2013

Minnie Mouse Party

My daughter loves Minnie Mouse, so we had a small party with my parents on her birthday to celebrate.  My mom is an excellent cake decorator, so she helped me out.  She had this  Mickey Mouse cake pan where he is wearing a party hat.  To make it look like Minnie, we cut off his party hat and made it look like a bow and then we just looked at a picture of Minnie Mouse when we frosted it. You could also always piece the cake together by backing two 9x12 cakes and cutting out with a pattern you draw or find online.  We also did pink and white cupcakes.  


Frosting Recipe:
4 cups powdered sugar
1 cup softened butter
1 tsp vanilla


We made a cute birthday banner using sparkly pink and black paper and placing stickers on each pennant, spelling out "Happy Birthday."  We punched holes in the pennants and strung with Minnie Mouse ribbon.  In between the pennants we placed pictures of my daughter and hung with small cloths pins. 

Tuesday, August 16, 2011

Race Car Birthday Party

My son wanted a race car birthday party this year. I had to put it together quickly, since my husband was going to be out of town when I was planning the party so I just had a couple of days to plan since there was no way my son was going to have the party AFTER his birthday without driving me insane asking about the party every five minutes.

I found tons of great ideas on this site here. We ended up keeping it simple. I had a breakfast party and I made the cake out of a stack of donuts that looked like race car tires served with fruit, bacon, and juice. The kids painted their own wood race cars and played pin the car on the race track. I planned on setting the table up like a race track and using these adorable road cones for cups, but since the party was earlier than planned they weren't delivered in time.


For his birthday cake that night, he had a race car cake. He loved it! It was super simple, too.

Race Car Track Cake:


Supplies Needed:
-One package OREO cookies
-One cake mix
-Frosting (see below)
-Coconut
-Green food coloring
-Car for top of cake
-Toothpicks
-Construction paper

Frosting:
2 cups powdered sugar
1/2 cup softened butter
1/2 tsp vanilla


I made one cake mix and then baked in two round cake pans. I cut the top of the cake off to make flat and flipped cakes over onto a piece of cardboard I covered with aluminum foil. I frosted the cake. I untwisted all of the Oreo cookies and the side without the cream I put in the food processor and crushed into a fine powder. I then poured it around the perimeter of the cake to look like the road. I then placed the Oreos with cream around the side of the cake to look like tires. I then dyed the coconut green and placed in the center of the cake to look like grass. I then took a spoonful of frosting and put it in a bag and piped it in lines to look like the dashed lines of the road.

Next, I cut out three triangles out of construction paper and taped to a toothpick and placed them by the road. I then found a checkered image online and put my son's name over it and printed it out to look like a race banner. I put a toothpick on each side of the banner to hold it up.

Sunday, June 19, 2011

Ladybug Birthday Party

We had a ladybug birthday party for my daughter this past weekend. I was terrible at taking pictures, so I don't have as many as I would have liked to but I thought I'd pass along some of the ideas.

The Invite:
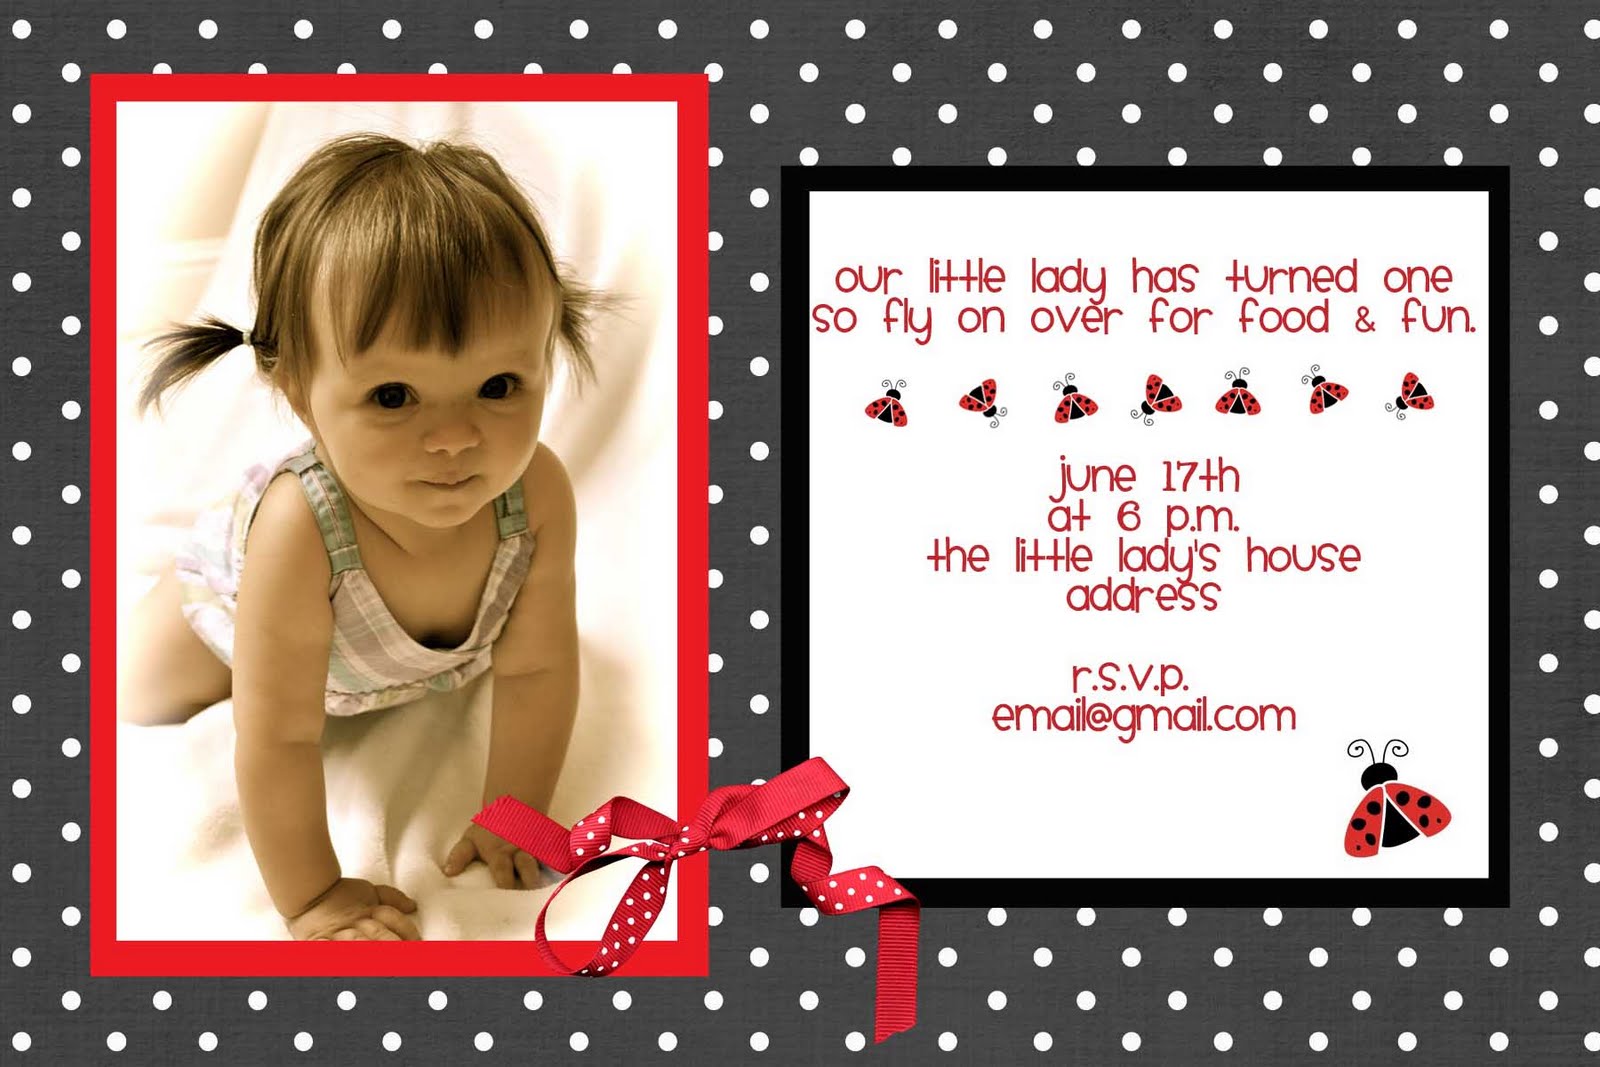
Below is the invitation to her party. I just found a fun lady bug image I liked online and a fun black and white poka dot image online as well. I created the invite in Photoshop Elements and had the invites printed at Wal-Mart as 4"x6" photos.

Display:
We were going to have the party outside on our patio but we had been finishing up planting a flower bed in time for the party and didn't even think about the smell that comes with fresh dirt. Our back yard basically smelled like a barnyard so we moved the party inside. I had a picture of the bday girl in a black frame and a vase of red flowers to go along with the red and black lady bug theme. I had red plates and cups and black utensils and napkins. I had a red and black balloon. I made a banner using black yarn and small clothes pins with pictures of her each month of her first year. The birthday girl was also wearing a cute little lady bug shirt. I had a lady bug costume, but she wasn't feeling well that day so I didn't want to put her in anything uncomfortable.


The Food:
I served these adorable ladybug cracker appetizers. I made this delicious Southwest pasta salad and had some bread to go along with it. I had a tray of strawberries with a dip which is made out of a 8 ounce container of strawberry cream cheese and 8 oz of marshmallow cream. For dessert we had cupcakes. I used a yellow cake mix and added zest from one lemon to it and then I frosted it with this lemon frosting. I made lady bug toppers to put on top using the same lady bug image I used on my invites. I printed twelve of the images to a page and printed them and cut them out in a circle shape. I then cut red card stock in a slightly larger circle and glued the ladybug cutout to the red piece. I then taped a toothpick to the back and stuck in the cupcake. They turned out really cute and were delicious. We served with some delicious Breyer's vanilla ice cream.

Photo credit: Taste of Home

Tuesday, May 31, 2011

Freezer Jam Pectin

I noticed at the store today that the no-cook freezer jam pectin I have recommended in the past has been redesigned and has a new look. So when you are at the store looking for it, this is what you are looking for.

I have bought mine at WinCo and Wal-Mart, but you can also order online here. It's the perfect time of year to make your strawberry freezer jam. I am hoping to make some later this week.

Saturday, January 15, 2011

Mushroom & Onion Turkey Melt


I don't know about you, but I get tired of eating the same old thing for lunch. I usually am too lazy to make anything that takes more than five minutes for lunch. We had deli turkey in the fridge today but I didn't feel like my usual cold turkey sandwich, so I thought of what else I could make with it. I then remembered back to my days living at home and the turkey melts my dad would make for dinner quite often. They are tasty and healthy!

Ingredients:
1/2 onion
10 mushrooms
Six slices of turkey
2 sandwich thins
Sliced mozzarella or provolone cheese
Dijon mustard
Extra Virgin Olive oil

Directions: Slice onions and mushrooms and saute in pan with olive oil.

In seperate frying pan, warm turkey. Place sliced cheese on top of turkey to melt.

Toast sandwich thins. Place turkey with melted cheese, onions and mushrooms, and dijon mustard on the buns and enjoy!

Saturday, January 8, 2011

Fit in Six Health Challenge

A friend invited me to participate in a Fit in Six Challenge Group she is running. It started on Monday and it has been a great way to help me discipline myself. I thought I'd give you a basic overview, if any of you are looking for some kind of plan to help you loose some weight.

Basic overview:
  • Eat good food each day (see good food list below) and stay away from bad foods (also see list below)
  • Drink 8 cups (64 oz) of water each day
  • Take a vitamin each day
  • Exercise (both cardio and resistance) - with the challenge you get points for exercising M-Sat but Sunday you rest
  • Don't eat after 8 p.m.
  • Choose an addiction to overcome that keeps you from living a healthy lifestyle (for me it is my daily chocolate feedings)
  • Read something inspirational for 10 minutes each day
  • Personal prayer daily
I like that the program is simple and I also get "points" for doing things I also have as goals to make sure I read the scriptures daily and pray. Taking time to meditate on higher things definitely is good for our health.

Below are the lists of good, bad, and safe foods.

Good Foods
3 Fiber (goal is 25 grams a day)
*Oatmeal (i.e. old fashioned or Quaker Weight Control)
*Whole grain hot cereals (unsweetened)
*Low sugar, High Fiber cereals (i.e. All Bran, Fiber One, ~10g/
serving)
*Whole grain bread, pita bread & tortillas
*Brown Rice
*Legumes (black beans, kidney beans, etc)
*Etc.

2 Protein
*Fish (tuna, salmon, halibut, etc)
*Shrimp
*Chicken (w/o skin)
*Turkey
*Eggs, Egg Whites, Egg Beaters
*Protein Shake (less than 250 cal per shake)
*Cottage cheese (nonfat or 1%)
*Legumes (black beans, kidney beans, etc)

2 Dairy
*Skim or 1% milk
*Lowfat cheeses (string cheese, mozzarella, laughing cow, etc)
*Lowfat or nonfat yogurt (Dannon Light ‘n Fit, 1 cup ~ 80 to 100 cal)
--If you are lactose intolerant or you have issues with dairy, you can
achieve similar results with soy products, a calcium supplement, etc--

All Fruit

All Vegetables

Supplements
*Multivitamin (Centrum gets good reviews)
*Calcium and Vitamin D (Oscal Ultra or Caltrate 600 Plus - good
reviews)
*Fish oil capsules on days when you did not eat fish (1 gram)

Bad Foods
-Sugary cereal, full fat granola, etc
-White flour pancakes, waffles, biscuits (Only one serving of white pasta, potato, etc a day)
-Fried foods, saucy foods, cheesy foods, full-fat cream sauce
-Bakery items such as muffins, cake, bagels, doughnuts, brownies, cookies, pie, sweet roll, danish, etc
-Soda or other drinks with sugar
-Mayo, sour cream, butter, margarine, creamy sauces, full calorie/full fat salad dressings, dips
-Ice cream, whole or 2% milk, cream, full fat cheeses, cream cheese
-Potato chips, Cheetos, Fritos, Doritos, Cheezits, crackers, etc.
-Fast food, Restaurant food, pizza (There are some good choices – your discretion)
-Chocolate, candy, candy bars, pop tarts
-Full sugar syrups, jams, jellies
-High sugar or high calorie protein bars over 150 calories.
-Regular beer or wine

Safe foods (these snacks have been great in helping me get a little "sweet" for the day
-Unsweetened cereals/Low in Fiber: Cheerios, Wheeties, Crispix, etc
-Nuts
-Low Sugar Jam
-Diet Soda or Crystal Light (both not necessarily good for you)
-Protein bar less than 150 cal
-100 cal popcorn snack or air popped popcorn
-Sugar free jello, Fat free sugar free jello pudding
-Fat free or Sugar free cool whip
-Skinny Cow ice cream ~120 cal a serving (similar ice sandwich or Low cal frozen desserts cream treats)
-Mustard, Salsa, Relish, Pickles
-Spray butter, Pam
-Olive oil, Canola oil
-Low-Cal, low-fat healthy alternatives

This challenge has helped me this week. I've worked out each day, eaten healthy, and I haven't had chocolate or dessert all week (except for my approved snacks on the safe food list). I feel great and I have lost a couple pounds. I hope to be fit at the end of the six week challenge and keep up these healthy habits! Do you have any healthy ideas to share?

Thursday, December 9, 2010

Polish Tea Cake Cookies (aka Thumbprint cookies)


This is my favorite holiday treat. My grandma always made these every Christmas and my mom always did, too. They are especially tasty if you fill them with homemade jam.

Ingredients:
-1 cup butter, softened
-1 cup sugar
-2 egg yolks
-1 tsp vanilla
-2 cups flour
-1/2 tsp salt
-2 egg whites
-2 cups chopped pecans
-About 1/2 cup raspberry or strawberry jam or preserves

Cream butter, sugar, egg yolks, and vanilla. Then add the flour and salt to the mixture. Roll dough into cookie balls and roll in egg whites and then in chopped pecans.

Place on cookie sheet and press middle of cookie with a thimble or wooden end of spoon. Bake at 325 degrees for 10 minutes and then press middle of cookie down again and bake 5-7 more minutes.

Don't overcook. When cookies are cool place jam in the middle of cookie. Makes 3 dozen.

This is me six years ago showing off my first attempt at making Christmas goodies, including making Polish Teacakes for the first time by myself.

Friday, October 22, 2010

All-Natural Fruit Snack


My son isn't a huge fan of fruit, which doesn't make sense to me because he loves vegetables. I discovered Stretch Island Real-Fruit Strips at my local grocery store last year and my son loves them (and so do I). Each strip counts as a 1/2 serving of fruit. The only problem was they are a bit pricey (33 cents each or more) at the grocery store and my son would eat five each day if I'd let him. So you can imagine how happy I was to discover that Costco now sells them and they are only 12 cents each. I wrote them a letter requesting them a couple months ago and I am not sure if that is why they now have them or not, but I am so happy they have them. So next time you visit Costco (or your grocery store) try them out. They are delicious and good for you!

Thursday, October 7, 2010

Fall Recipe Roundup

Fall is here and so are all the yummy pumpkin and apple goodies. Below are some of my past fall recipes and a goodie bag to deliver them in to your friends.


Monday, August 9, 2010

Zucchini Brownies


A friend recently gave me some zucchini, so I decided to make zucchini brownies. My mom would makes these every summer when we had more zucchini in our garden than we knew what to do with. You do have to have a bit a of paradigm shift before you eat these brownies. They aren't super sweet and rich like my other brownie recipe. These are extremely moist but just a little sweet. They only have a 1/2 cup sugar compared to my other recipe that has six cups between the brownie and frosting. So if you are watching what you are eating like I am, this is a good way to get a little bit of sweetness without all the sugar.

Zucchini Brownies

1/2 cup sugar
1/4 cup cocoa
1 egg
1/2 cup vegetable oil
2 tsp vanilla
2 cups flour
1 tsp salt
1/2 tsp soda
2 cups shredded zucchini
1/4 cup chopped walnuts (optional)
1/4 cup dark chocolate chips

Mix first five ingredients together and then add the flour, salt, and soda. Finally, add the zucchini and nuts and chocolate chips (if using). Pour into a greased 8"x8" pan.

Bake at 350 degrees for 20-30 minutes.

Saturday, August 7, 2010

Fire Truck Cake

We just celebrated my son's birthday and he wanted a truck cake, so I decided to go with a fire truck because I found this really easy video tutorial on how to make one. It was easy, the only thing I would do different is use my homemade butter cream frosting. I have never used the store bought frosting in the can and it was really runny. The fire truck ended up looking like it had melted in a fire, so I am embarrassed to post a picture of mine. However, my son loved it and that's what counts. Right?

Fire Truck Cake Instructions

For video demo click
here.

Supplies:
Cake mix

Cake board
Frosting (see recipe below)
Frosting bag (or a ziplock bag cut in one corner will work)

4-6 Oreo cookies (depending on how many wheels you want your truck to have, I did 6 since I couldn't find a licorice wheel for the hose)

8 red gumdrops
4 yellow gumdrops

Red and gray food coloring gel

Make a cake mix and bake in three 8"x4" bread loaf pans. Divide batter equally. Bake for time according to package instructions. Remove from oven and let cool for ten minutes and then remove cake from pan. When cool, trim top of cakes to make flat. Place one cake on a cake board or cardboard covered in wrapping paper/foil. Cut off 1/8th of the second cake and place on top of the first cake on the cake board. Cut the third cake in half and stand both halves vertically in front of the other two cakes to create the cab of the fire truck. Make frosting, use the recipe below (don't use the Betty Crocker store bought kind, it is too runny to work with and you'll end up with a mess).

Butter cream frosting

2 cups powdered sugar
1/2 cup softened butter

1/2 tsp vanilla


Color two cups of frosting red using red food gel coloring (you'll need two tubes to get it really red). Leave some of the frosting white for the windows and color the rest gray using gel food coloring for the piping around the bottom of the fire truck. Frost the fire truck red. Then add oreo cookie wheels. Then pipe with gray piping around the bottom. Make window and ladder on truck using white icing. Add gumdrop lights.

An easy and fun cake, your fire engine loving child will love!

Photo credit


Friday, May 14, 2010

Strawberry Freezer Jam using Aguave

Last year I posted a simple freezer jam recipe using Ball's Simple Creation No-cook Freezer Jam Pectin. Since strawberries are now in season and we recently ran out of jam, I decided it was time to make more. I have heard of people using agave so I recently bought some and decided to try it with my jam. Agave is sweeter than granulated sugar, so you use less of it when making the jam.

Here is the recipe:

4 cups crushed strawberries
1 package Ball's Simple Creation No-cook Freezer Jam Pectin (update: pectin repackaging now looks like this.)
3/4 cups agave


Mix the agave and pectin in a large bowl. Wash your strawberries (I like to spray with this fruit/veggie cleaner first), remove stems, and cut in half and place in food processor or blender.

Place the four cups of crushed berries into the large bowl with pectin and agave. Mix for 3 minutes and then pour into jam containers. Let jam thicken for 30 minutes before placing in the freezer.

That's it. No cooking required. You just simply mix. I love this pectin!

This is a very healthful jam and I really can't taste a difference between using agave and sugar.

Here is a break down of the cost of this jam. I got 5 jars of jam.

Strawberries - $2
Agave - 2.25 (estimated by how much I used of the bottle)
Pectin - 1.42

Total - $5.67
Total per jar - $1.14

You definitely can't buy a jar of jam for that much at the store, especially one that contains agave! This only took me a 1/2 hour start to finish and is something anyone can do. Enjoy!

Thursday, May 13, 2010

Agave as sugar substitute


I've been curious to try agave as a sugar substitute, so at my recent outing to Costco I bought a couple bottles of the Organic Blue Agave syrup. It seems that many health conscious people are using it these days and I thought I'd do a little research on it. You, like me, may also be curious so here is some info I found on agave from this site.
  • Agave is a plant that grows in Mexico and is actually best known as the source of tequila. The agave nectar (syrup) come from the core of the plant. The core of the blue agave is harvested after growing 7-10 years and looks similar to a pineapple and can weigh 50-150 pounds! The sap is extracted from the core of the plant, filtered, and heated to make the agave syrup. See picture below.
  • Tastes similar to honey.
  • It is a good substitute for sugar because it has a lower glycemic index (produces only small fluctuations in our blood glucose and insulin levels, which enables long-term health by reducing your risk of heart disease and diabetes and is the key to sustainable weight loss).
  • Provides sweetness without the unpleasant "sugar rush" and unhealthful blood sugar spike caused by many other sugars. Acceptable with many diet plans.
  • Agave is sweeter than sugar so you can use less of it (4 parts sugar = 3 parts agave).
  • Agave also has a lower glycemic index than honey and doesn't crystalize like sugar and is safe for babies.
  • A great substitute for corn syrup with half the glycemic index.
  • Gluten free and may work with some diabetics diets.
You can purchase agave at health stores, Costco, or online. I believe I paid $9 for two bottles at Costco and each bottle was 23.5 oz.

Tuesday, March 30, 2010

Easter breakfast idea: Monkey Bread

I enjoy having a big breakfast on Easter. This year I am going to make Monkey Bread. It is something you can make before going to bread and let rise and then bake first thing in the morning. My mom would usually make this every summer when we were at my grandparent's cabin. I remember always looking forward to it. The Rhodes Rolls website has a two minute movie tutorial you can watch. They call the recipe Butterscoth Bubbleloaf.


Monkey Bread (aka Butterscoth Bubbleloaf, from Rhodes website)

24 Rhodes Dinner Rolls, thawed but still cold
1/2 box butterscotch or vanilla pudding mix, non-instant
1/2 cup pecans, chopped
1/2 cup brown sugar
1/2 cup butter or margarine


Cut dinner rolls in half and dip in dry pudding mix. Arrange rolls in sprayed bundt pan, alternately with pecans. Sprinkle any remaining pudding mix over the top. Combine brown sugar and butter. Heat together until butter is melted and a syrup is formed (microwave about 1 1/2 minutes). Pour syrup over rolls. Cover with sprayed plastic wrap. Let rise until double in size or even with top of bundt pan. Carefully remove wrap. Bake at 350°F for 30-35 minutes. Cover with foil the last 15 minutes of baking. Immediately after baking, loosen from sides of the pan with a knife and invert onto a serving plate.

You can just eat this or you can serve with eggs and bacon or your other favorite breakfast dishes. It is delicious!

Sunday, March 28, 2010

No Bake Cookies

As usual, I was craving something sweet but I didn't have any eggs in the house. I decided to make no-bake cookies. This is just a recipe combination I have made up to fit my tastes preferences. It is one of those recipes you can adapt to what you have on hand.

No Bake Cookies

1/2 cup butter
1/2 cup milk
1 cup sugar
1 cup semi-sweet chocolate chips (can substitute cocoa)
1/2 cup peanut butter (I like using all natural since it doesn't have any added sugar)
1 tsp vanilla
3 cups oats (quick or regular)
1/2 cup shredded coconut (optional)
1/2 cup chopped pecans (optional, can add more than 1/2 cup if desired)

Combine butter, milk, and sugar in saucepan. Bring to a boil for 2 minutes. Turn off heat and quickly whisk in chocolate chips and peanut butter. Add vanilla. Then mix in oats, coconut, and nuts. Place drops of mixture on piece of wax paper to set. Makes 20 cookies.

Wednesday, March 10, 2010

Easter Cupcake Bouquet


This is another fun idea from No Fuss Fabulous that I switched up a bit. Cupcakes are such fun foods and putting them together in a bouquet is a fun way to serve them.

You will need:
1 cake mix (I used strawberry)
Frosting (see recipe below)
Skewers
Foam ball
Bucket/pail (just big enough to fit foam ball - not too big)
Easter candy toppers/premade candy melts
Easter grass (optional)

Butter cream frosting

2 cups powdered sugar
1/2 cup softened butter
1/2 tsp vanilla


Prepare your cake mix and then bake your mini-cupcakes. One cake mix will make about 60 mini-cupcakes. You only will need about 20 for the bouquet. Make your frosting (see recipe above).

I cut my skewers into thirds and placed in the foam ball. I placed ball inside my Easter pail. My pail was a bit big for the ball so I bought Easter grass to fill in the gap on the side.

Place a dab of frosting on the cupcake and then place Easter candy on top.

Place cupcake on the skewer on the foam ball. Follow this process until your bouquet is finished.


You could also do smaller bouquets and place them in a tin can. I covered mine with a sandwich baggie and tied with a ribbon so people could take and eat then or later. My cupcakes were so soft that some of my cupcakes didn't say onto the skewer well, but overall it turned out okay.